
Gaku-A3 shown
Strokes 6, 9, and 10 Connected
Strokes 6, 9, and 10 Connected
Strokes 6, 9, and 10 Connected

This is historically the main criteria used to identify Shotoku ichibuban; stroke 10 is directly connected to stroke 6 and doesn't touch stroke 9 at all.
Wide Calligraphy
Strokes 6, 9, and 10 Connected
Strokes 6, 9, and 10 Connected
Strokes 5 and 6 together span almost the entire width of the coin.
Small Strokes 1-3
Strokes 6, 9, and 10 Connected
Small Strokes 1-3
Stroke 1, 2, and 3 are all fairly short. Also note that stroke 3 has a distinct bend.

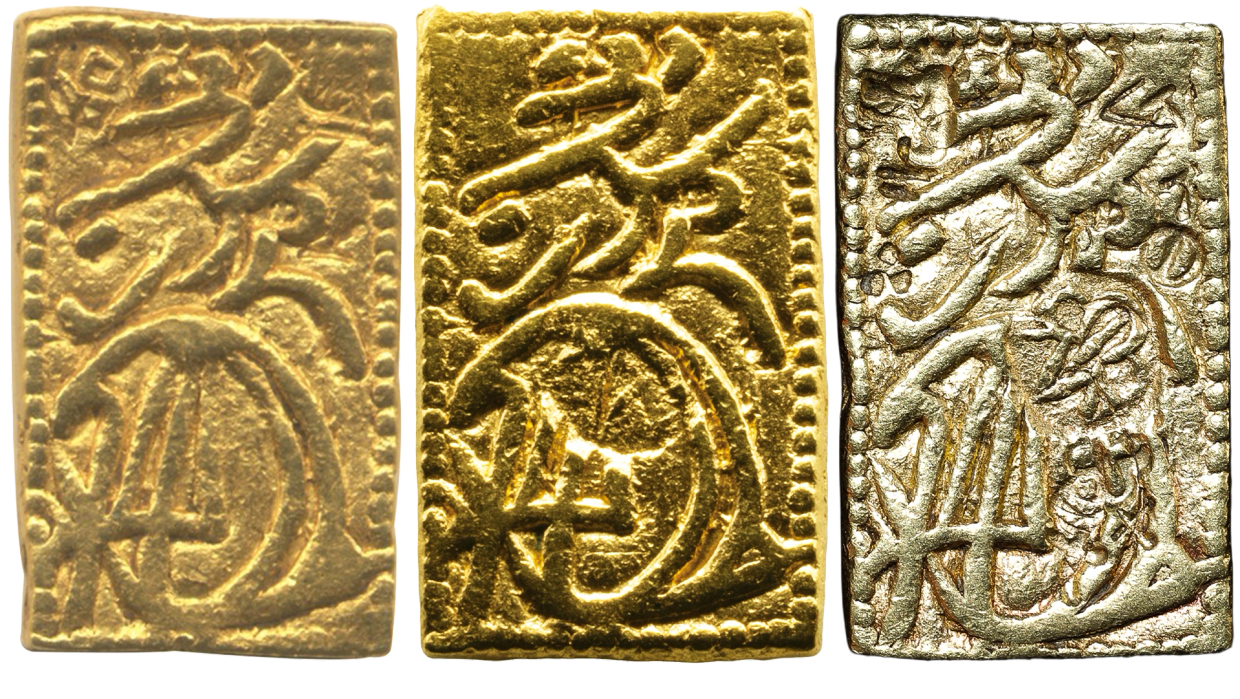
Shotoku-A1
Commentary
The center example above is one of very few Shotoku ichibuban with no chopmarks, making it one of the clearest die impressions. This specific example seems to show a later die state of A1 with noticeable die chips in multiple places. This piece uses Shotoku-B1. As most of these chips are not visible on other examples of the same die, they have not been highlighted below.
Stats
Total Found: 9/27 (33%)
Paired with:
- Shotoku-B1 (6/9)
- Shotoku-B2 (2/9)
- Shotoku-B3 (1/9)
Kirimon stamp present on 5 or 6 examples
A1 Diagnostics
Alignment of Strokes 5, 7, and 8
Alignment of Strokes 5, 7, and 8
Alignment of Strokes 5, 7, and 8
The left end of strokes 7 and 8 are (more or less) in line with each other, while the left end of stroke 5 is further left.
Space Between Stroke 9 and Kao
Alignment of Strokes 5, 7, and 8
Alignment of Strokes 5, 7, and 8
There's quite a bit of space between stroke 9 and the top of the kao.
Stroke 6 Ends Below Stroke 4
Alignment of Strokes 5, 7, and 8
Stroke 6 Ends Below Stroke 4
The right end of stroke 6 is slightly below the corner of strokes 4 and 5. On most dies stroke 6 is noticeable higher than this corner.
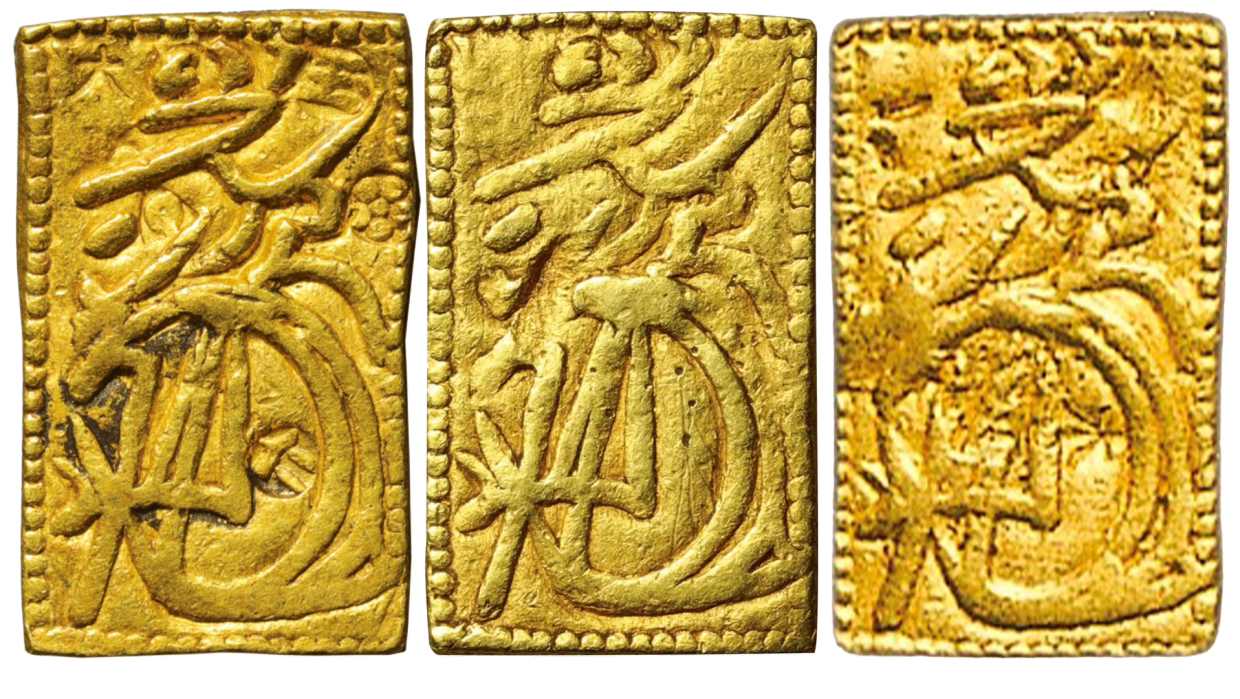
Shotoku-A2
Commentary
This is one of the more difficult dies to identify, with very few unique characteristics. Even those highlighted below are pretty minor and can easily be obscured by chopmarks, making this die easier to identify by process of elimination and a comparison of general style rather than a few key points.
Stats
Total Found: 6/27 (22%)
Paired with:
- Shotoku-B2 (1/6)
- Shotoku-B3 (1/6)
- Shotoku-B4 (4/6)
Kirimon stamp present on 5 examples
A2 Diagnostics
Stroke 7 Collides with Stroke 5
Stroke 7 Collides with Stroke 5
Stroke 7 Collides with Stroke 5
There's an indentation along the bottom of stroke 5, right above stroke 7, where the two come close to intersecting.
Die Chip Below Stroke 8
Stroke 7 Collides with Stroke 5
Stroke 7 Collides with Stroke 5
There's a small die chip coming off a dot in the border near the left end of stroke 8.
Dot Embedded in Stroke 8
Stroke 7 Collides with Stroke 5
Dot Embedded in Stroke 8
There's a small dot embedded near the right end of stroke 8.
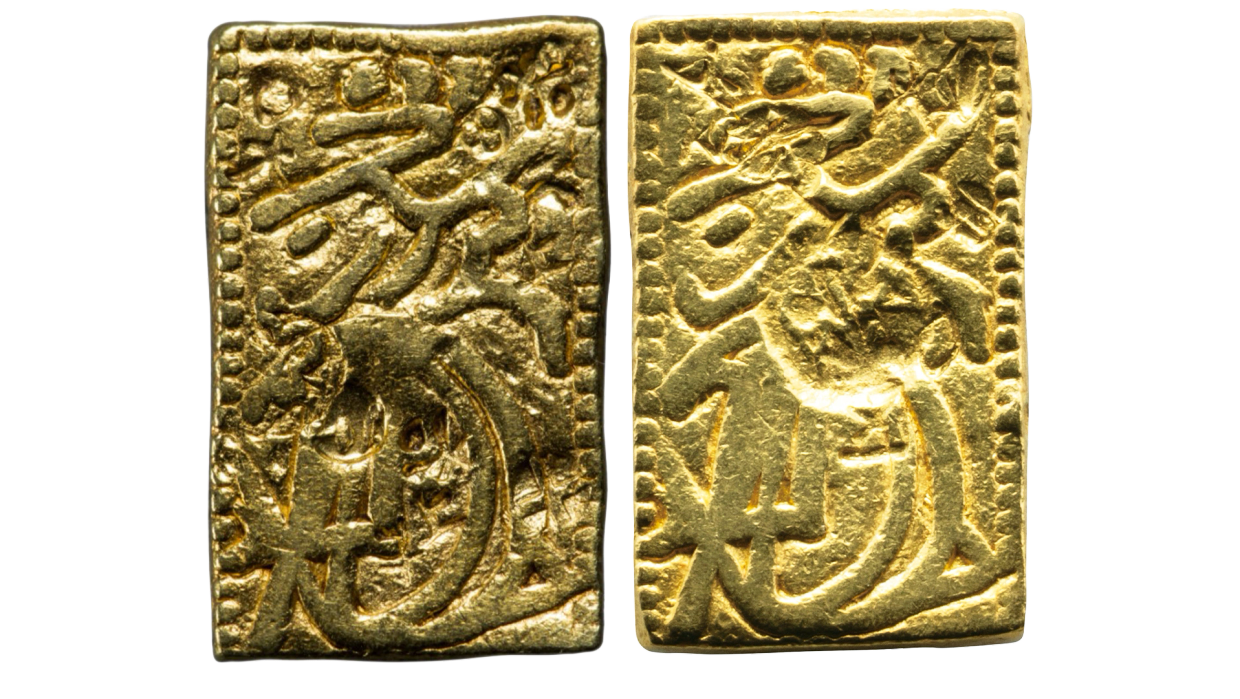
Shotoku-A3
Commentary
This die is very easily identified by the shape of the right side of the kao. All other known dies have a much larger gap between that side of the kao and the dot border.
Stats
Total Found: 5/27 (19%)
Paired with:
- Shotoku-B3 (4/5)
- Shotoku-B4 (1/5)
Kirimon stamp present on 2 or 3 examples
A3 Diagnostics
Stroke 12 Hits Border
Kao in Line with Border
Stroke 12 Hits Border
Stroke 12 connects with two dots in the border.
Space to Left of Kao
Kao in Line with Border
Stroke 12 Hits Border
Dies A1 and A3 are the only ones where the bottom left opening in the kao doesn't touch the dot border.
Kao in Line with Border
Kao in Line with Border
Kao in Line with Border
The right side of the kao is directly beside the dot border with very little gap between the two elements.
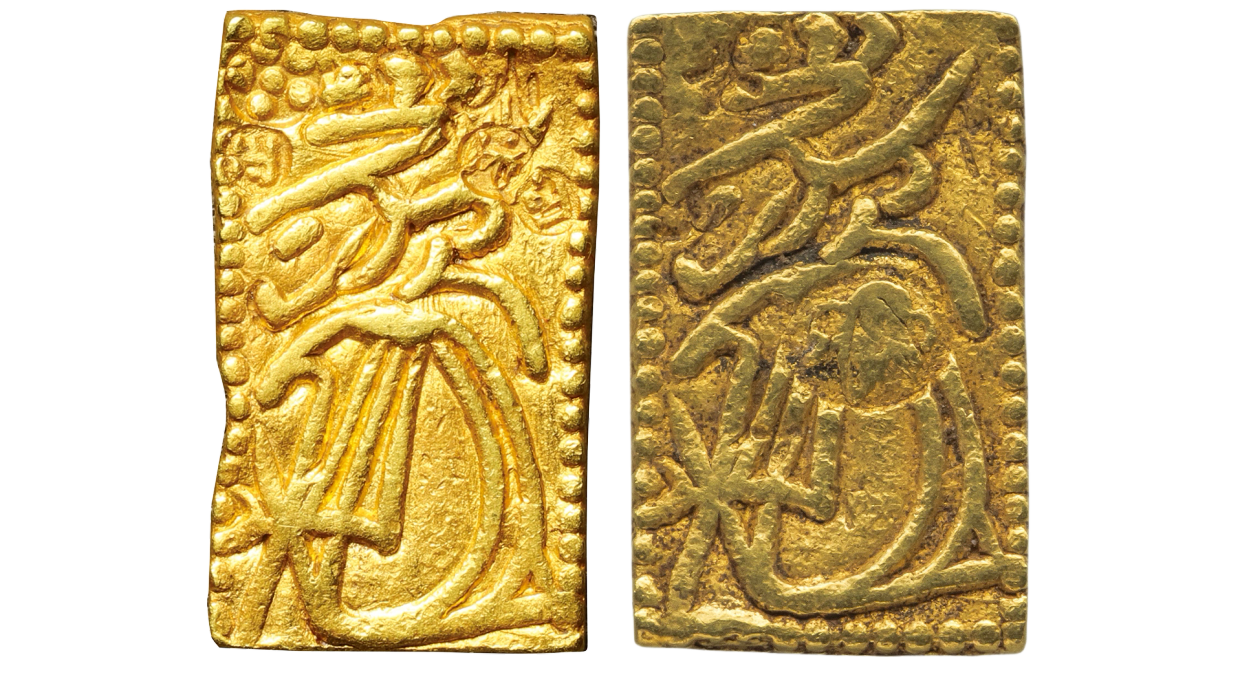
Shotoku-A4
Commentary
Many Shotoku dies are difficult to distinguish. If trying to attribute a piece, it's important to consider the overall style and some of the larger elements before looking at the smaller diagnostics. The position of the right end of stroke 6 relative to stroke 4 is an easy way to narrow down the potential dies.
Stats
A4 Diagnostics
Alignment of Strokes 5, 7, and 8
Alignment of Strokes 5, 7, and 8
Alignment of Strokes 5, 7, and 8
The left sides of strokes 5 and 8 are in line with each other, and stroke 7 is further to the right.
Kao and Left Border
Alignment of Strokes 5, 7, and 8
Alignment of Strokes 5, 7, and 8
The top left curve of the kao collides with the dot border.
Bump on Stroke 12
Alignment of Strokes 5, 7, and 8
Bump on Stroke 12
There's an extra bump on the top of stroke 12.
Shotoku-A5
Commentary
This die has very few unique characteristics, and I strongly urge you to look beyond just the diagnostics identified below if trying to attribute a piece.
Stats
Total Found: 2/27 (7%)
Paired with:
- Shotoku-B3 (1/2)
- Shotoku-B4 (1/2)
Kirimon stamp present on 1 example
A5 Diagnostics
Height of Stroke 6
Kao Opening Between Dots
Height of Stroke 6
The right end of stroke 6 is noticeably higher than the top of stroke 4.
Hook on Stroke 6
Kao Opening Between Dots
Height of Stroke 6
There's a small hook coming off stroke 6, just to the right of stroke 9.
Kao Opening Between Dots
Kao Opening Between Dots
Kao Opening Between Dots
On the kao opening, the top line is pointing directly between two dots.
Shotoku-A6
Commentary
Identifying useful diagnostics is difficult for dies with fewer known examples. With only one piece to look at, it's difficult to tell what may be damage to this piece versus die breaks. For example, there's a line coming off the left end of stroke 7 that may be a die crack, but could also be a scratch on this example. The presence of chopmarks obscuring parts of the design only complicates it further.
Stats
A6 Diagnostics
Stroke 12 Close to Border
Two Dots Within Kao Opening
Stroke 12 Close to Border
Stroke 12 is long and close to the border without fully colliding with the dots.
Parallel Lines in Kao
Two Dots Within Kao Opening
Stroke 12 Close to Border
The four vertical lines in the center of the kao are more or less parallel with each other.
Two Dots Within Kao Opening
Two Dots Within Kao Opening
Two Dots Within Kao Opening
There are two dots contained within the kao opening.
Shotoku-A7
Commentary
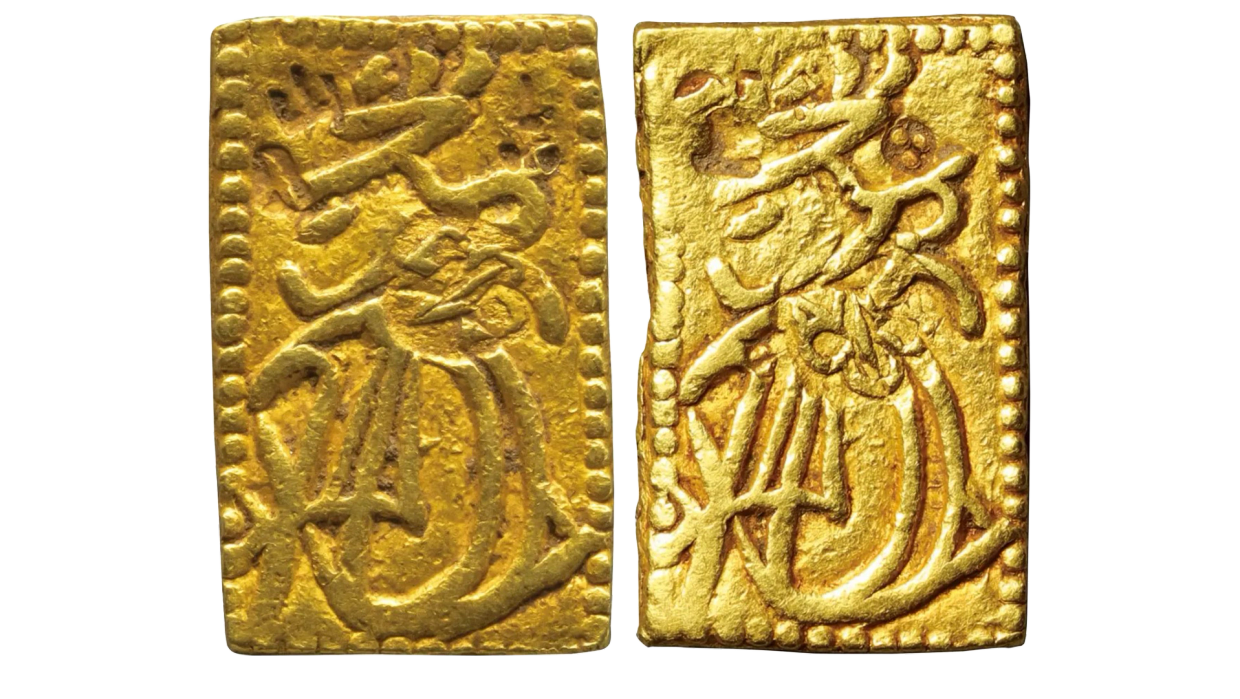
This is perhaps the most distinctive die, with plenty of characteristics that could be pulled out as diagnostics. The short stroke 6 is one of the most obvious tells that you may be looking at an example of A7, but I've pulled out some smaller differences below. See the main Shotoku ichibuban die study page for more discussion of this die specifically.
Stats
A7 Diagnostics
Stroke 6 Below Stroke 4
Stroke 6 Below Stroke 4
Stroke 6 Below Stroke 4
The end of stroke 6 is significantly lower than stroke 4.
Points on Stroke 7
Stroke 6 Below Stroke 4
Stroke 6 Below Stroke 4
Stroke 7 has somewhat pointed ends.
Die Chip in Kao
Stroke 6 Below Stroke 4
Die Chip in Kao
There's a small die chip within the kao.